so this is a very brief tutorial which is completely retard-friendly I promise
;)
First click the link from my site and you'll be re-directed to a file host
like MediaFire etc. Anywho...... From there find the download link and begin
your download it may take a few minutes dependeding on the contents of the
download. Once it's downloaded find the download on your computer, my files
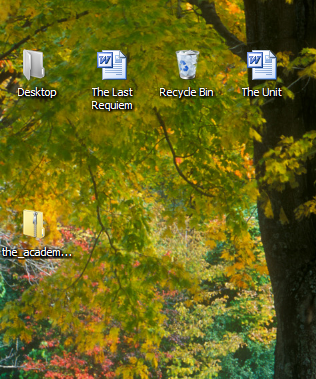
download to my desktop and when I finish downloading i have something that looks
like this on my desktop:
Ignore everything but the manila folder with the zipper on it.
These folders are called "Zip Files" which seems pretty self explanatory. Now
from here you need to "Unzip" the folder to retrieve the music inside. Most
computers have a program called WinZip which can open these kinds of files. Now
put your mouse over the zip folder and right click it. A menu should pop up and
what you'll be looking for is some selection that says either "Extract",
"Extract All" something to that affect. Click that selection and you'll be
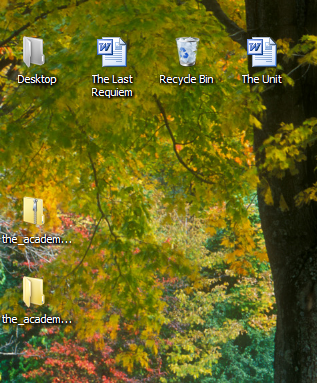
prompted through the "Extraction" of folder. Once this step is completed you
should have something that looks like this in the same directory as your
original file. IN OTHER WORDS. Another folder will pop up lookin' like diss:
Now what you need right now is the folder without the zipper
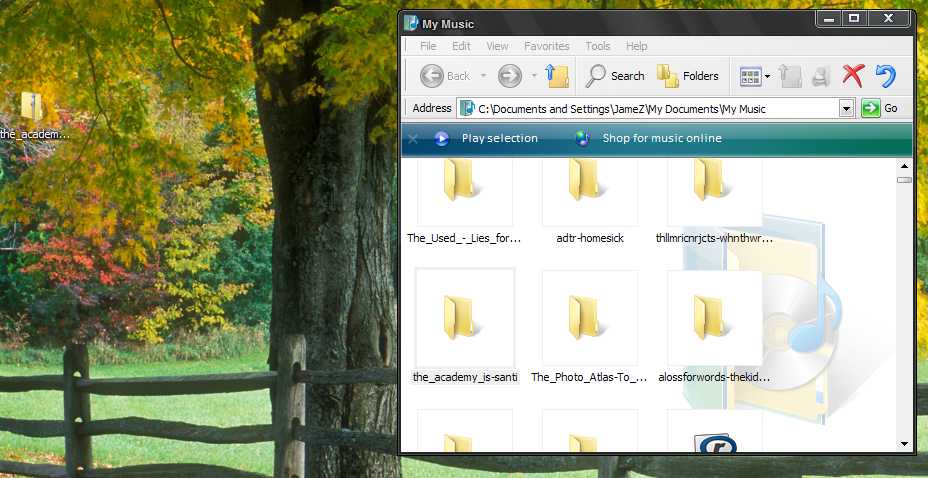
on it the one at the bottom and what I'd suggest you do is open up your "My
Music Folder". And drag the bottom folder NOT THE ZIP into your "My Music
Folder" for organizational reasons mainly.
Now if you look in the "My Music" you can see in the middle on the right side
that I placed the NON-ZIP folder into the music folder. Trust me this will make
things easier later.
Now there ya go if you go into the non-zip
folder within it will be the MP3's that you want.
Now if you
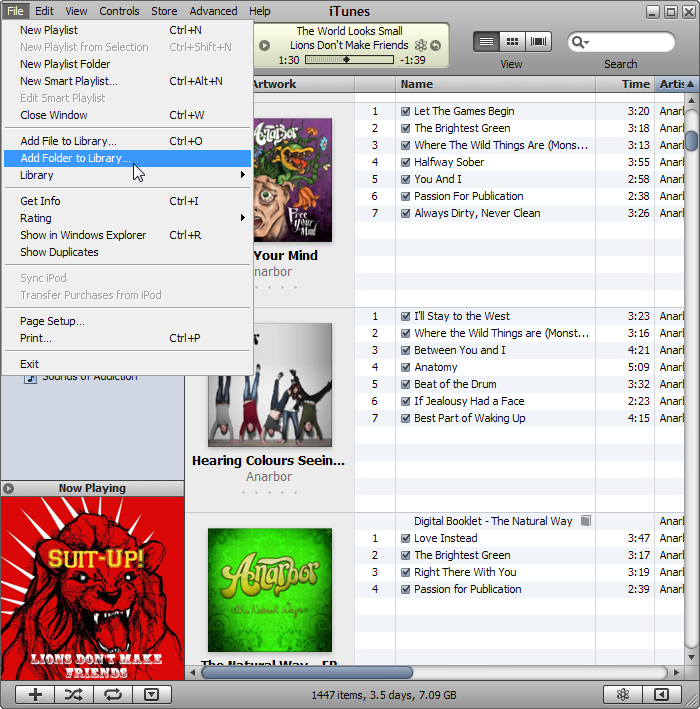
want to move the music into your iTunes, follow these 2 simple steps:
One you click the "Add Folder to Library..." the below will pop up for you.
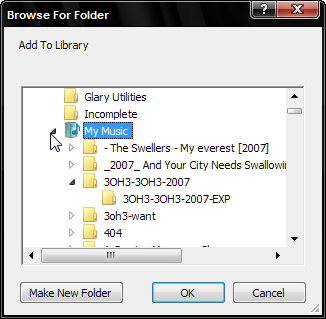
Within the above window search the "My Music Folder" and look for the folder
that contains the music you wish to put on iTunes. Once you find the folder
click it once and click okay and it will be added to your iTunes library.
That's it Ya'll. Comment if you're still confused ;)


No comments:
Post a Comment